How to Request a Free Trial and Renew Service When the Trial Ends
1. Request a Free Trial
1.1 Sign up for a Cloud Clusters Account
To use the Cloud Clusters service, you will need to register an account first. The process only requires your email or a third-party account such as Google Plus, GitHub, and Facebook.
To sign up with an email, input your email address and desired password, then confirm to read the ToS and Privacy Policy, followed by clicking the Create button. To sign up with a third-party account, click a third-party service and log in with your account.

1.2 Choose a Suitable Plan for Your Project
Cloud Clusters offers cloud application hosting, VPS, GPU VPS, and dedicated servers. If you are new to Cloud Cluster, you can request a free trial before actually paying for the plan. If you cannot determine which plan is suitable for your project, feel free to reach out to us and share your server usage, data size, the name of the hosted application, and more. Based on the information, the team will be able to recommend a plan.
- Choose a cloud application hosting Plan at https://www.cloudclusters.io/
- Choose a Linux VPS Plan at https://www.cloudclusters.io/cloud/linuxvps/
- Choose a Windows 10 VPS Plan at https://www.cloudclusters.io/cloud/win10vps/
- Choose a dedicated server Plan at https://www.cloudclusters.io/server/dedicated
1.3 Submit a Free Trial Order
For each type of hosting service, we have different free trial policies.
For Cloud application hosting
We provide a 7-day free trial for cloud application hosting by default. Once your order is accepted, the free trial will be issued automatically.
Choose a suitable plan and click on the Free Trial button on the plan.

It will take you to the order submittion page. On the page, please choose the desired application version. Next, move the mouse to the right and click the Free Trial button to submit the order.

For Other Typers of Hosting
For other types of hosting, you can request a 1-day free trial to experience the full service. However, it happens that the free trial request may be rejected when server stock is limited.
Choose a suitable plan for your project and click on the Order Now button on the plan.

It will take you to the order submittion page. On the page, please fill in the required information, including server name, server password, and operating system. As it's a free trial order, addons cannot be installed. If you need addons, you can add addons as you need after the trial.

Then, scroll down the page to the Note section and leave a note of "1-day free trial." Next, move the mouse to the right and click the Check Out button to submit the order.

1.4 Comfirm Your Order
Upon clicking the Free Trial Now or Check Out, you will be redirected to the order confirmation page. On this page, you can verify if the order is correct before submitting the order. If it is correct, click the Confirm button. Otherwise, go back to the check out page to update any item you'd like.

1.5 Complete Your Billing Information
To request a free trial, you will need to activate your account with valid billing information. Therefore, once you confirm your order, you will be required to update your billing information so that Cloud Cluster can validate your account and thus issue the free trial to you.

The validation process can take up to 2 hours. During the process, your trial server is in the pending status.

Once the account passes the verification, Cloud Clusters will deploy the server for you and the trial server will be in the active status. Normally, for automatical server delivery, the deployment for applications or VPS need 1-10 minutes, while dedicated server deployment may take 20-40 minutes. If the server needs to be manually delivered, it may take 2-4 hours, or even longer. When the deployment completes, you will receive an email containing the server information, which can also be found in the control panel. Click the Manage button to find login information and manage your server.

2. Renew Service When the Free Trial Ends
If you enjoy Cloud Clusters's service during the trial period and you would like to continue using the service, you can pay for the service to renew it. Upon the renewal, your subscription will be extended. You can follow the steps below to renew your service.
2.1 Find Unpaid Invoice in the Control Panel
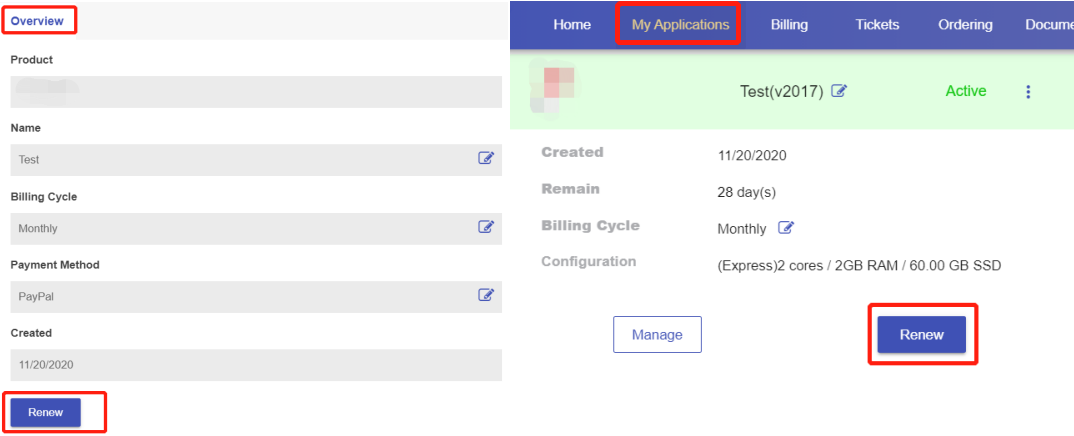
There are several methods to find unpaid invoice for your free trial order. First, log in to the Control Panel and locate your free trial order.
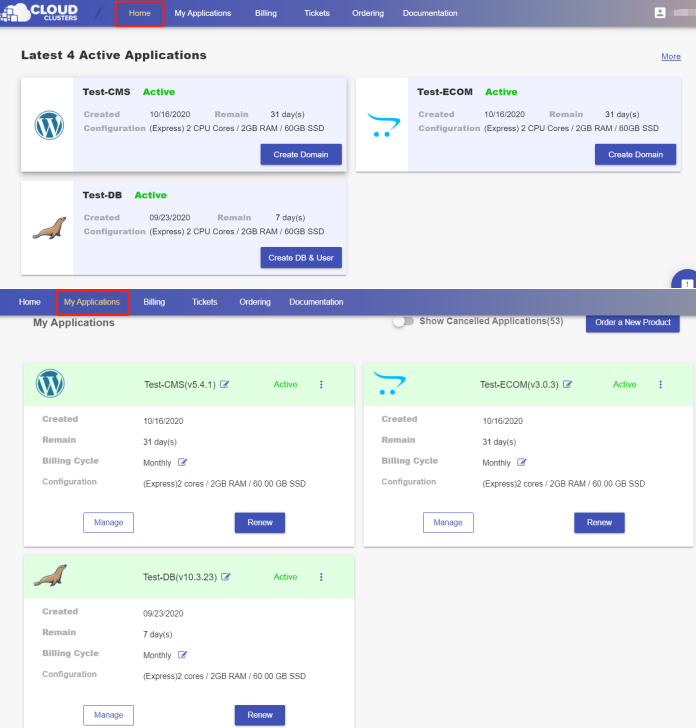
Method 1: Then, locate your free trial order. Clicking the Renew button will take you to the invoice.
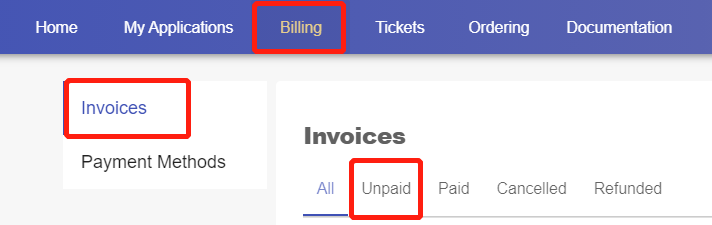
Method 2: You can also navigate to the Billing > Invoices > Unpaid. Next, click into the invoice for your free trial server.
2.2 Change Billing Cycle (Optional)
Currently, the free trial order is with a monthly subscription. You can switch to a longer billing cycle and enjoy a discount provided for long-term subscription. Once the billing cycle is changed, a new invoice with the new recurring amount will be generated.

2.3 Make payment
Cloud Clusters provides credit card and PayPal for payment. Choose one that you prefer.

Once the invoice is paid, then your service starts to be renewed and often the process finishes within a few seconds.
Note: Please note that if the invoice remains unpaid when your service is overdue, the service is scheduled to be suspended 3 days past due and to be canceled 14 days past due.
We also recommend enabling the auto-renew feature by adding your credit card to our platform. With this feature, you don't need to worry about missing the due date and causing service disruption.